


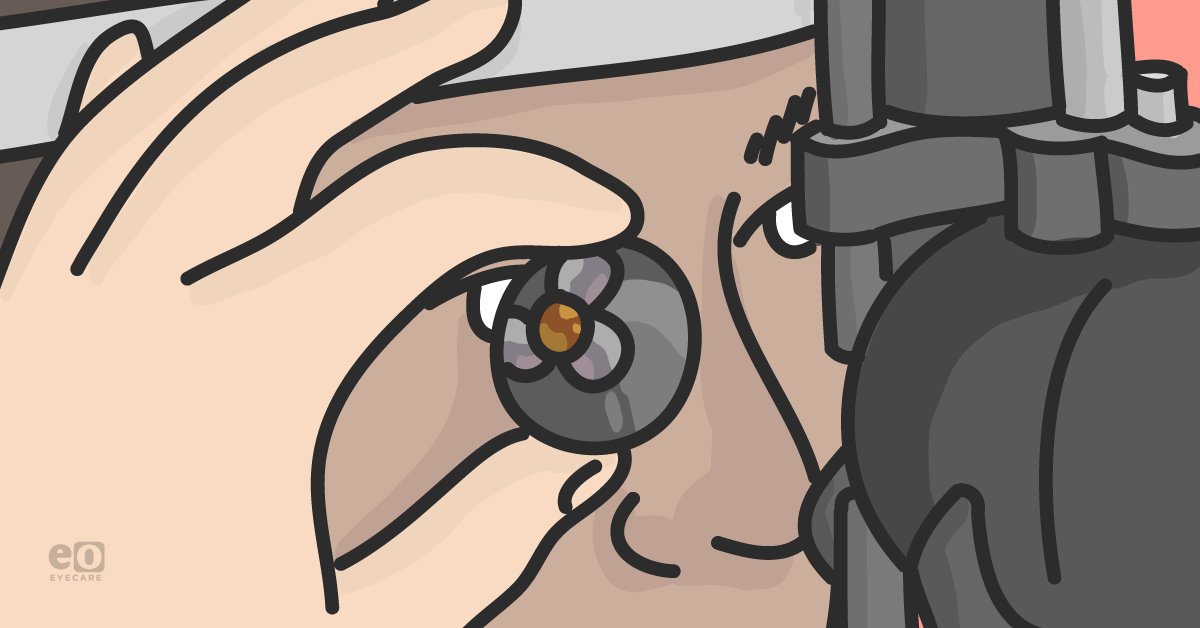
One of the most daunting exams in early ophthalmology residency is the gonioscopic exam. Having to balance a small prism on a patient’s eye at the slit lamp, avoiding placing too much pressure (for risk of corneal striae), while trying to identify microscopic stripes as important anatomical landmarks takes great practice. While mastering the physical art of gonioscopy does take much repetition, it also means very little if you don’t understand the anatomy of the angle.
Start with the anatomy
Gonioscopy is performed during an eye exam to evaluate the internal drainage system of the eye—the anterior chamber angle. This “angle” is where the cornea and iris meet and is the location where the aqueous humor flows into the venous circulation.1-5 Due to its location, the angle cannot usually be seen on slit lamp exam—a gonioprism is placed on the surface of the eye to allow for better visualization.
Iris insertion is variable between eye to eye as to where it inserts on the ciliary body, which is posterior to the scleral spur.1-6 Less commonly, the iris will insert on, or anterior to the scleral spur. The iris thins at the periphery near its insertion. This is the first landmark for you to find when performing gonioscopy.
Ciliary Body Face: The ciliary body is located behind the iris. It secretes aqueous humor and controls accommodation, regulation of aqueous outflow, and secretion of hyaluronate into the vitreous, as well as maintenance of a portion of the blood-aqueous barrier.1-6 The longitudinal muscle of the ciliary body controls the outflow of aqueous by pulling open the trabecular meshwork and Schlemm’s canal.
Schlemm’s Canal: Schlemm’s canal is a modified capillary containing valves that recoil and expand in response to changes in intraocular pressure.6,7 The lumen of these valves is compressed between the walls of the canal at intraocular pressures of 25mmHg.7 Interactions between the trabecular meshwork and Schlemm’s canal help form a conventional outflow pathway of aqueous—this is the primary route for aqueous drainage from the eye.1-7
Scleral spur: The scleral spur is composed of a band of collagen fibers that run parallel to the limbus. It marks the posterior border of the trabecular meshwork and projects slightly into the anterior chamber, and is seen as a white-yellowish line in most eyes.2,5,6 The longitudinal muscle of the ciliary body attaches to the scleral spur and opens the trabecular meshwork by pulling on the spur. The structural integrity supplied by the scleral spur may prevent the ciliary muscle from causing a collapse of Schlemm’s canal.2,5-7
Trabecular Meshwork (TM): The trabecular meshwork is located between the scleral spur and Schwalbe’s line. Approximately 90% of aqueous outflow is through the trabecular meshwork—this flow is pressure-dependent, increasing as intraocular pressure increases.1-6 Aqueous humor flowing through the trabecular meshwork enters Schlemm’s canal and from there flows into the scleral, episcleral, and conjunctival venous systems.1-6 For aqueous to exit the eye by this route, the intraocular pressure must be higher than the episcleral venous pressure.1-7 The trabecular meshwork consists of 3 layers.6 Closest to the aqueous is the uveal meshwork, which extends from the ciliary body to Schwalbe’s line and covers the ciliary body face, scleral spur, and trabecular meshwork.2-6 In most eyes, the uveal meshwork is colorless but may be seen as a glistening veil in the angle of young patients.2,6 The uveal meshwork does not provide any resistance to aqueous outflow.1-7 Iris processes may be seen on gonioscopy, and appear as thicker strands in front of the uveal meshwork and extend from the periphery of the iris to the trabecular meshwork.2,6 The corneoscleral meshwork is the central layer that extends from the scleral spur to the anterior wall of the scleral sulcus and lies deep to the uveal meshwork.2,6 This layer does not offer significant resistance to aqueous outflow.1-6 The deepest layer of the trabecular meshwork is the juxtacanalicular tissue, the last layer that aqueous crosses before entering Schlemm’s canal.2,6 The juxtacanalicular tissue has trabecular endothelium on one side and Schlemm’s endothelium on the other—between these endothelial layers is a loose connective tissue and provides the most resistance to aqueous outflow.1-7 Aqueous outflow occurs primarily through the posterior portion of the trabecular meshwork—which is the portion that overlies Schlemm’s canal. With time, this posterior portion of the meshwork usually becomes pigmented, whereas the anterior meshwork usually remains relatively nonpigmented.2,6
Schwalbe’s Line: Schwalbe’s line occurs in a 50-150µm transition zone between the trabecular meshwork and the corneal endothelium.2-6 It is the posterior border of Descemet’s membrane and anterior border of the trabecular meshwork.2-9 There is a transition from the scleral curvature to the steeper corneal curvature at Schwalbe’s line, which can cause a settling of pigment in this area in some eyes, called a Sampaolesi line.6
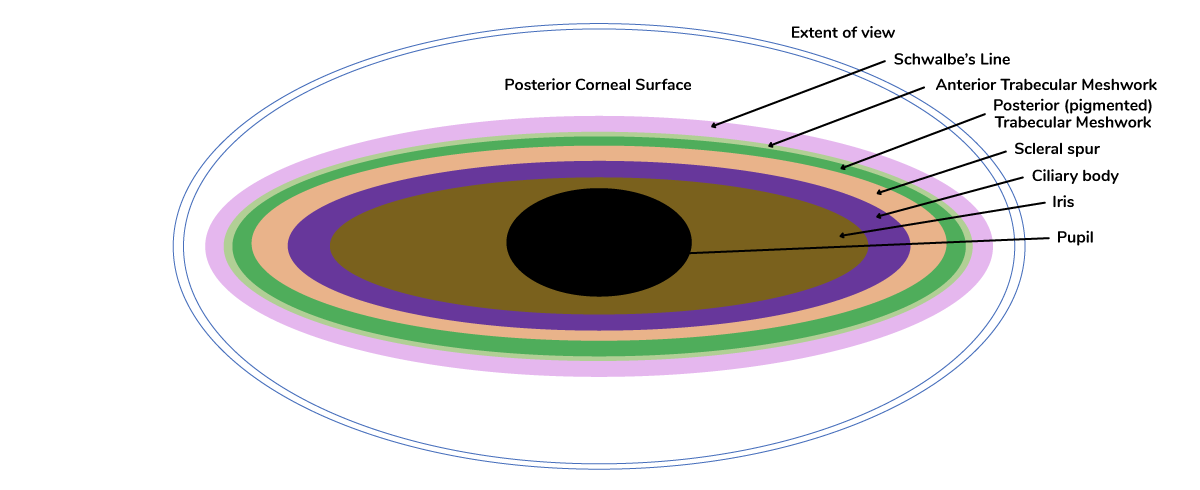
Below is a schematic of the anterior chamber angle.

How to grade the angle
Describe what you see! A classification system may be used to describe the angle anatomy, such as Spaeth or Shaffer system. Important items to include in the description are degrees the angle is open, identifiable structures, notation of pigment density, presence or absence of synechiae, and additional visible structures.
Grading systems permit a systemic recording of gonioscopic findings and future reference. Several systems for grading the angle have been proposed—there is no “right or wrong” system – just stick with one that works for you, and make sure it is annotated properly in your clinical notes for other providers that may be seeing the patient as well.
Scheie System: Developed in the 1950s, this system uses Roman numerals to describe the degree of angle closure, with larger numbers denoting a narrower angle.2-4 The first step is to identify the angle structures on exam. This scale also incorporates degree of pigment in the angle (“0” meaning no pigment, “IV” indicating heavy/intense pigment). The table below outlines this system in more detail.2-4,6
| Grade | Wide | I | II | III | IV |
|---|---|---|---|---|---|
| Structures Visible | Schwalbe’s line, anterior and posterior TM, Scleral spur, Ciliary body face, iris root | Schwalbe’s line, anterior and posterior TM, Scleral spur, Ciliary body face | Schwalbe’s line, anterior and posterior TM, Scleral spur | Schwalbe’s line, anterior TM | None |
| Description | Wide open | Slightly narrowed | Apex not visible | Posterior ½ of TM not visible | No angle structures visible |
Shaffer System: This is a more commonly used system; it describes the degree to which the angle is open rather than closed.6 For example, whereas Scheie’s grade IV correlates to a closed angle, Shaffer grade 4 refers to an open angle.2-8 This system approximates the angle at which the iris inserts relative to the TM.6 Angles from 0-20 degrees are considered to be capable of angle closure, whereas if the angle between the iris and TM is 20-45 degrees, the angle is felt to be at no risk for closure.2-6 The Shaffer system was further modified to form the Shaffer-Kanski system, which also notes the risk of angle closure with each angle grade. In general, grade “0” is a closed angle, grade 1 has risk of possible angle closure, grade 2 is a narrow angle with unlikely closure, grade 3 and 4 generally are not at risk of angle closure.2-8
Spaeth System: This is a more complex system that focuses on three major features of the angle anatomy: level of iris insertion, width of the angle, and iris configuration.2-6 Level of iris insertion is graded “A” through “E”, which “A” indicating insertion anterior to Schwalbe’s line, “B” for insertion anterior to the posterior limit to the TM, “C” for insertion posterior to scleral spur, “D” for insertion onto the ciliary body face and “E” for “extremely deep” insertion.2-6 The angle width is estimated between the vectors of a line tangential to the TM and a line tangential to the surface of the iris.2-6 The curvature of the peripheral iris is then described as “f” for a regular/flat configuration, “b” for forwardly bowed iris, “c” for concave curvature and “p” for plateau iris.2-6 In addition, the Spaeth system may include information obtained from indentation gonioscopy. If, for example, if indentation demonstrated that the insertion was a “D”, when it appeared to be a “C” without indentation, this would be indicated as “(C)D”. A complete example of this complex system is, “(C)D30f”—this would indicate iris insertion at the level of scleral spur, but ciliary body on indentation, angle width of 30 degrees and flat iris configuration.
Practice-Practice-Practice
The only way to become adept and comfortable with gonioscopy is practice—both at identifying structures and documenting clearly. In the beginning, it is normal to experience frustration and even confusion, especially in eyes where it may be difficult to identify angle structures (lightly colored TM, poorly cooperative patients). As with building any exam competencies, familiarity with anatomy and specific exam findings will gradually allow you to feel more comfortable over time. In cases where gonioscopy just is not possible, you may try utilizing the Van Herick system. This is a non-gonioscopic grading system that uses an estimation of the peripheral anterior chamber depth at the slit lamp (best done prior to dilation).1-3,6 Here, a thin slit beam is angled approximately 60 degrees and aimed at the cornea peripherally near the limbus—the corneal thickness is then compared with anterior chamber depth.1-3,6 The ratio is used to provide some information on the width of the anterior chamber angle.1-3,6 In a pinch (think: at 3am on call in the ER), it can at least guide you if the angle is deep enough to safely dilate the pupil for a fundus exam. Please note, this does not replace gonioscopy.
Tips for performing gonioscopy
New patients should undergo gonioscopy during their initial evaluation, if possible. Established patients previously diagnosed with narrow angles that do not require immediate treatment should have annual gonioscopy exams; it is recommended patients with primary open angle glaucoma should have a gonioscopic exam every 1-2 years.1-6 Gonioscopy should be performed after testing the patient’s visual acuity and intraocular pressure and before performing dilated examination—that being said, gonioscopy is best performed in a dark room.6 When faced with a difficult exam, ultrasound biomicroscopy (UBM) and anterior segment optical coherence tomography (OCT) are useful adjuncts for determining the presence of plateau iris or if you are unable to visualize structures in the angle with gonioscopy alone.1-6
Most gonioscopy we do in the office is called ‘indirect gonioscopy’. This may utilize Posner, Sussman, Zeiss, and Goldman goniolenses. Done with the patient sitting up at the slit lamp, the viewer will have a slightly inverted and foreshortened image of the opposite angle because the light from the angle is reflected off a mirror and directed towards the viewer.6 ‘Direct gonioscopy’ by comparison may utilize Koeppe, Barkan, Swan-Jacob, Wurst or Richardson lenses.6 Here, the viewer has an erect view of the angle structures—this is most easily performed when a patient is supine, such as during surgery or an exam under anesthesia.
Dynamic gonioscopy, or compression gonioscopy can be used to determine if an angle is truly closed (e.g., with present peripheral anterior synechiae (PAS) or simply a closed angle with iridotrabecular contact).2-6 Both entities are important to identify as management varies differently—the former may require incisional glaucoma surgery, while the latter is more apt to need prophylactic iridotomy and observation. Compression gonioscopy is performed using a Posner, Sussman or Zeiss-style lens at the slit lamp.2-6 Gentle pressure is placed on the cornea, and the aqueous if forced into the anterior chamber angle—if there is only iridotrabecular contact/apposition, the angle will open and the angle structures will become more visible. If PAS is present, the angle will look the same.6
Why do gonioscopy?
The intraocular pressure is maintained by a constant production and drainage of aqueous fluid—if this drainage system is not working properly, the pressure can increase, leading to optic nerve damage and glaucoma.1-9 By examining the anterior chamber angle, one can determine if it is open or closed, as well if there are abnormal blood vessels, adhesions (synechiae) or damage from prior eye trauma. By determining the degree of angle opening, we can diagnose open vs. angle closure glaucoma, and best determine next steps in management—as these entities often require different treatment approaches.
A closed angle can predispose to acute angle closure glaucoma – which is accompanied by a rapid sudden increase in intraocular pressure, and is a vision-threatening emergency. It is important to identify angle closure, as performing a prophylactic laser iridotomy can prevent this severe condition and vision loss.
Comfort with gonioscopy not only helps with diagnosis of medical conditions, but also helps in treatment. For example, being able to use a gonioprism during intraocular surgery allows us to perform vision-saving procedures, minimally invasive glaucoma surgery (MIGS), and detect underlying conditions that not only identify eye problems, but systemic conditions as well. For example, albeit rare, tumors such as melanoma, may be present in the anterior chamber angle on exam.
The importance of gonioscopy is quite clear—it is a valuable skill that should be used by all ophthalmologists, not just glaucoma specialists!
Understanding how your front-line colleagues approach glaucoma is more important than ever. Download Eyes On Eyecare's free 2023 Glaucoma Report to see how your peers diagnose, treat, and manage this condition!
References
- Gregory A. 7 Clinical Pearls for Great Gonioscopy. American Academy of Ophthalmology. 2016
- Alward W, Longmuir R. Anatomy of the Angle. Color Atlas of Gonioscopy. The Foundation of the American Academy of Ophthalmology.Wolfe Publishing. 2001 pp. 9-14
- Alward W. Gonioscopy: Essential to Patient Care. Glaucoma Today. September/October 2008. 32-34
- Shaffer R. Primary glaucomas. Gonioscopy, ophthalmoscopy and perimetry. Trans Am Acad Ophthalmol Otolaryngol. 1960;64:112-27.
- Alward, W. L. M. (2007) Atlas of Gonioscopy. http://www.gonioscopy.org/
- American Academy of Ophthalmology, Glaucoma, Section 10. Basic and Clinical Science Course. San Francisco: American Academy of Ophthalmology; 2014:38-42
- W.D. Stamer, The Biology of Schlemm’s Canal, Editor: Darlene A. Dartt, Encyclopedia of the Eye, Academic Press, 2010, pp. 165-172
- Spaeth GL. The normal development of the human anterior chamber angle: a new system of descriptive grading. Trans Ophthalmol Soc U K. 1971;91:709-39
- Ernst R. Tamm, Barbara M. Braunger, Rudolf Fuchshofer, Chapter Eighteen - Intraocular Pressure and the Mechanisms Involved in Resistance of the Aqueous Humor Flow in the Trabecular Meshwork Outflow Pathways, Editor(s): J. Fielding Hejtmancik, John M. Nickerson, Progress in Molecular Biology and Translational Science, Academic Press, Volume 134,2015

